Overview of Greenhouses and Intro to Python
Lesson Information
This lesson is an overview of the structure of the 2-week course. The students will see what a table-top smart greenhouse looks like and learn what they will need to get it to work. By the end of the lesson, the students will know what a micro-controller is and have some basic experience programming with (Micro)Python.
The purpose of the lesson is to:
- Overview the goal and logistics of the course
- Introduce the concept of greenhouses
- Walk students through the hardware and software systems that they will use in the course
- Establish expectations for the course
Driving Science Questions:
- What do greenhouses do?
- What are some of the variables that we can control/manipulate in a greenhouse?
Science Concepts:
- Greenhouses: a structure with walls and roof made mainly of transparent material, such as glass, in which plants requiring regulated climatic conditions are grown.
Computer Science Concepts:
- Micro-controllers (MCU): are compact computers dedicated to one task
- Programming languages: contains instructions for computers to do things
Materials Needed
A fully functional smart greenhouse for demonstration, smart greenhouse kits for each pair of students, Reading Material
Target Skills
- SWBAT talk about what a micro-controller is and its difference from micro-computer
- SWBAT do simple and advanced math in the terminal
- SWBAT articulate what is to expect when they are coding and what qualities are required to become good coders
Instructional Plan and Structure
Do now! (15 minutes)
Set up a fully functional smart greenhouse before class. As students come in, invite them to take a look at the smart greenhouse and explore what it can do and how it does it. Encourage the students to guess which part does what.
As the students get settled, ask them to discuss in pairs these two questions:
- What does a greenhouse do?
- What can we do to make a greenhouse smart? What do we need?
Have the students share their ideas.
Explain to the students that their final project is to build a smart greenhouse themselves. Here are the expectations:
- Use at least one type of plant
- Use at least 1 sensor to automatically control another device
- Upload the data to a server
By the end of the course, they could also choose to bring the smart greenhouse home to continue taking care of their plants.
Hardware and software environment (15 minutes)
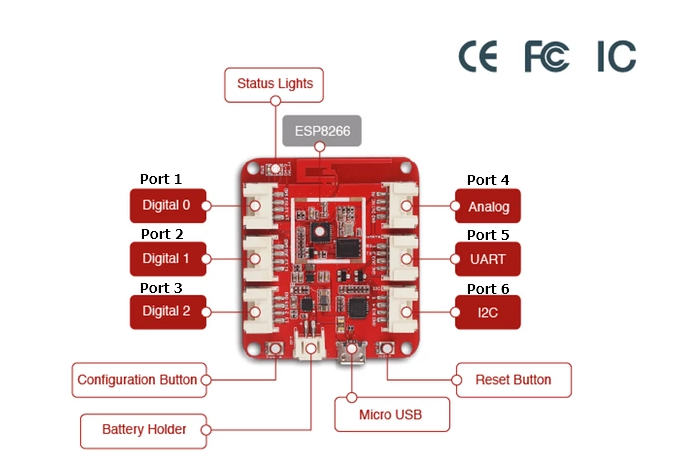
Introduce to the students that they are going to build the smart greenhouse by programming a micro-controller (or MCU, micro-controller unit). Show them the Wio Link board that they will be programming. Explain that a MCU is like a computer. The biggest difference is that desktop computers or laptops are more powerful, so we use them to do many things, such as web surfing, gaming, coding, listening to music, etc. MCUs, on the other hand, are smaller and designed to do one task, so they can be made much smaller and cheaper. We can directly program MCU to control other devices, such as sensors. After this, walk the students through the usb ports, configuration and reset buttons, battery ports, the LED indicators, and the 6 ports we will be programming with.
Introduce to the students that we are going to code in a programing language called Python (ask students what they know about programming languages). The reason why we use Python is that it’s easy to learn, but at the same time very powerful. It’s one of the most popular languages nowadays, and Python skills are very desirable in the job market.
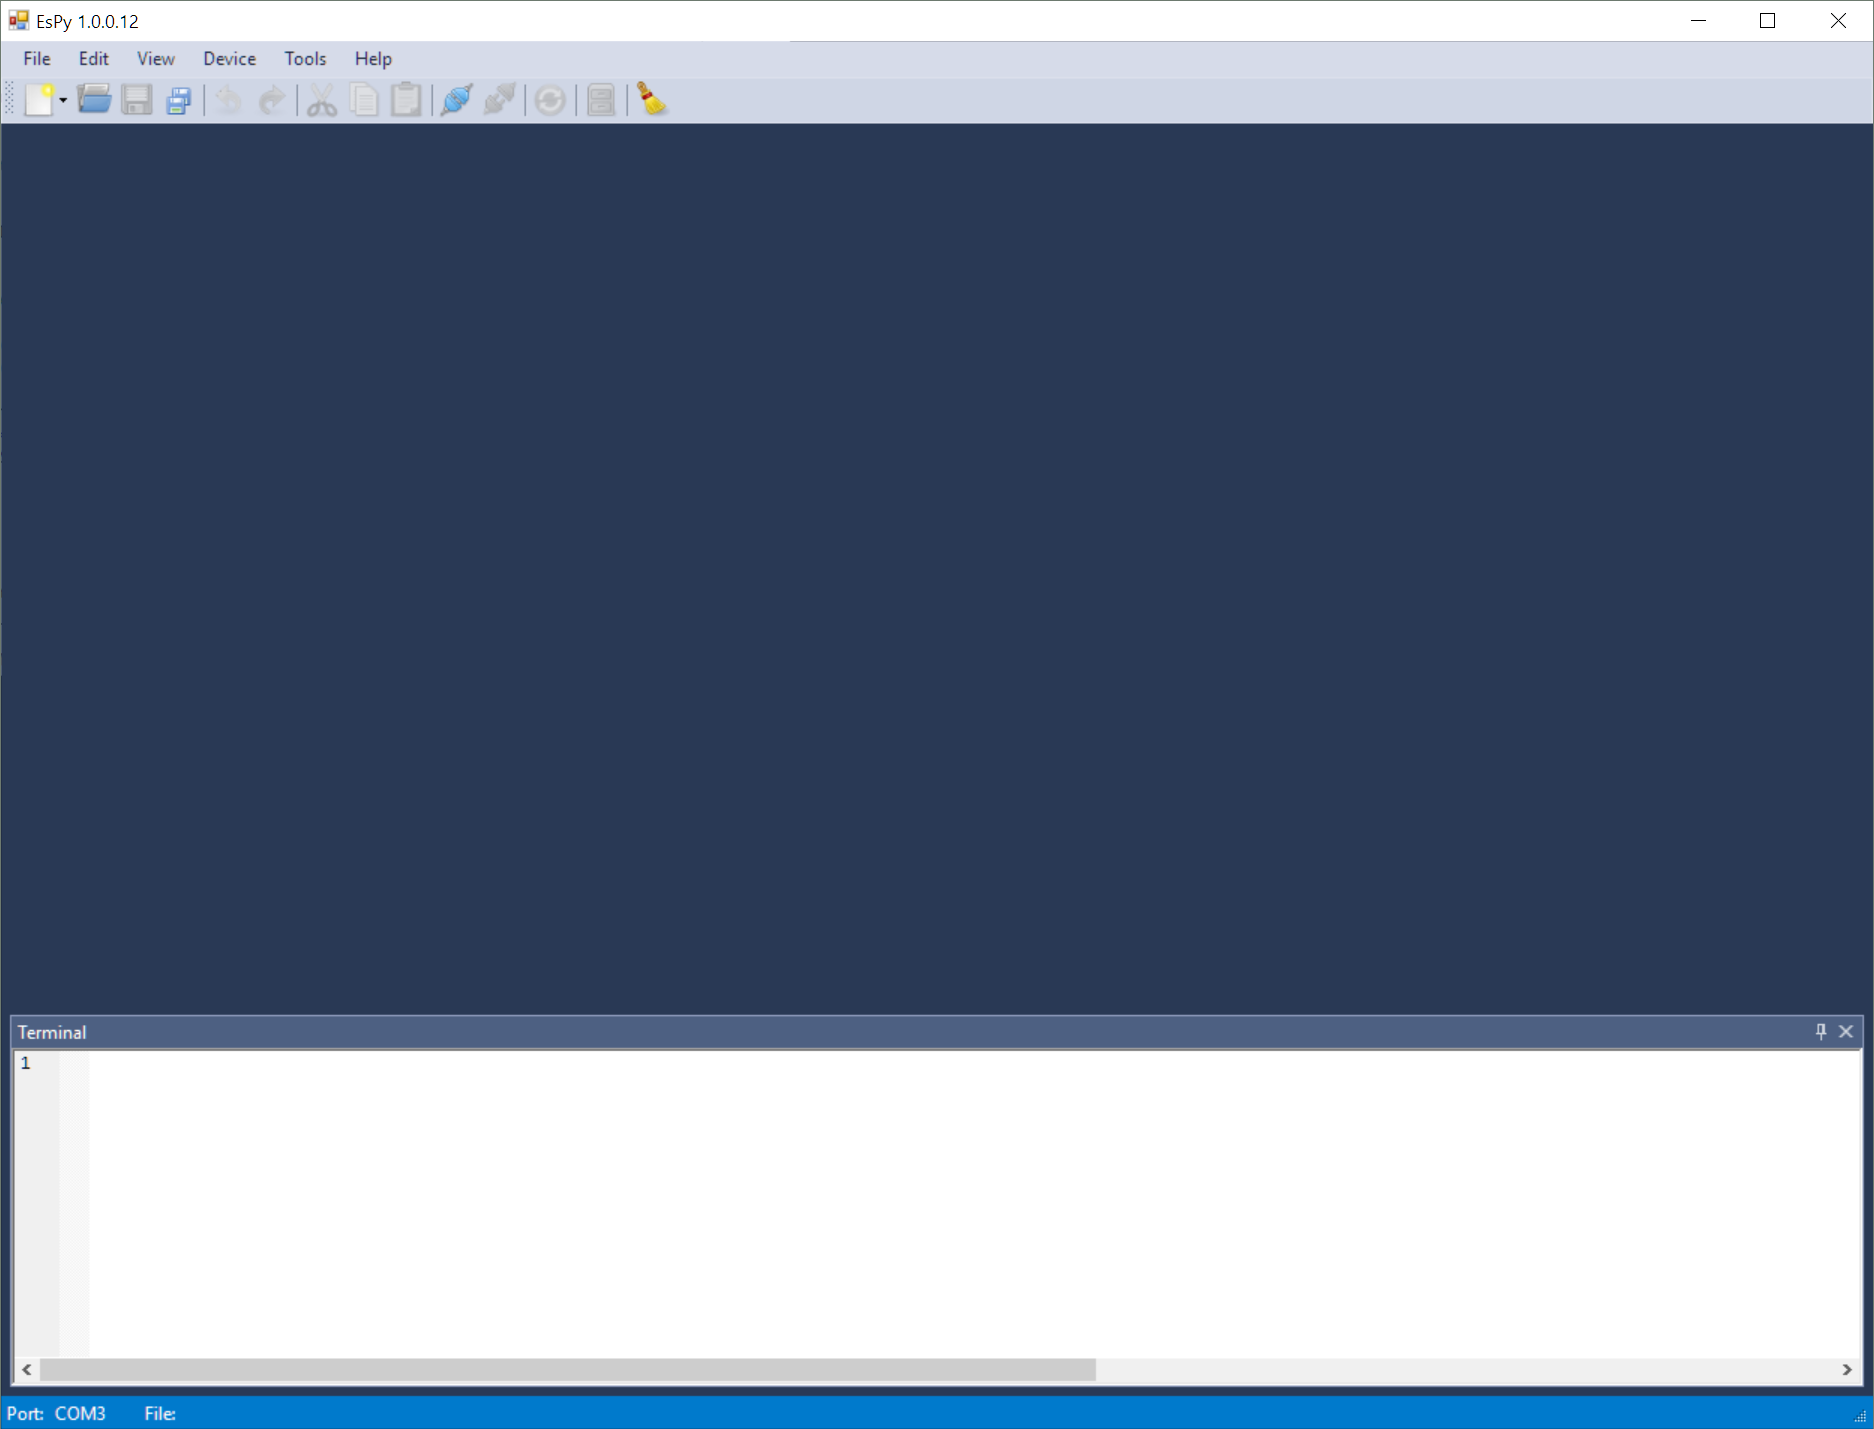
Now demonstrate to the students the EsPy program that they are going to be using. Walk them through how to connect the Wio Link board to the computer, find the port in EsPy, and get it ready to program in EsPy.
Since MCUs are computers, we can use them as sophisticated calculators. Within the terminal, start typing in basic math operations, such as5 + 10 and 1.2-1.0. Addition and subtraction might be easy, but some
students might not be familiar with the multiplication * operator, the
division / operator, and/or the exponentiation operator **. Make
sure they locate these operators on the keyboard. The exponentiation
operator can be used to obtain really large numbers, which Python
handles well. Make sure the students have the chance to experience that.
It does NOT matter if there are spaces, or even multiple between values and operators.
Here are the basic mathematical operators in Python:
| Python operator | Mathematical Operator |
|---|---|
a + b |
\(a+b\) |
a - b |
\(a-b\) |
a * b |
\(a \times b\) |
a / b |
\(a \div b\) |
a ** b |
\(a^b\) |
It is possible to carry out complicated operations, such as square roots and trigonometry. In order to do that, we will need to type in import math in the terminal. Notice that import becomes blue, which means that this word has special meaning in Python.
Smartphones only come with basic functionalities, such as connecting to WiFi, text messages, etc. Apps will expand the functionalities of smartphones. Python works the same way. Base Python offers only basic functionalities. We will need extra modules to do more sophisticated things. Before we use these modules, we will need to import them.
Now, use math.sqrt(625) and see what happens. Explain to the students that sqrt() is a function. Ask the students to compare the similarities of this notation with a function that they know in math. The dot notation tells Python to look for this function in the math module, which works like a folder. A lot of mathematical functions are organized within the math folder. Also introduce from math import sqrt to avoid writing math. over and over again.
Free coding and challenges (15 minutes)
- Connect the MCU to the computer and start programming
- Within the terminal, perform addition, subtraction, multiplication, division, and exponentiation. Try division by zero
- Use the
mathmodule to perform square roots - Perform trigonometric operations in the terminal as well, such as
sin,cos, andtan
What makes a good programmer (coder)? (5 minutes)
Have the students discuss the following question:
- What makes a good coder/programmer?
Explain to the students that we will be answering these questions throughout the course. We will revisit these questions at the end of the course and see if their ideas will change. When discussing Question 3, highlight the idea that the most important quality of a good coder is not intelligence, but resiliency. Codes don’t work 99% of the time, and it is important that they don’t give up.
Review and Assessment (5 minutes)
Upload your code to Google Classroom
Exit slip
- What do greenhouses do?
- What is a module in Python and how to use them?
- What makes a good coder?